
Part 3: Designing an Experiment
When we used the Script Helper Tool, it also created a Design File called TutorialDesignFile.asset. This is the file used to set up our experimental design.
The design file provides a simple interface that access a powerful behind-the-scenes system for setting up your experimental design without having to write any code.
- Click once on the created design file in the Assets folder to look at its inspector.
- You'll see several options. For more detail on what these settings do please see the main documentation.
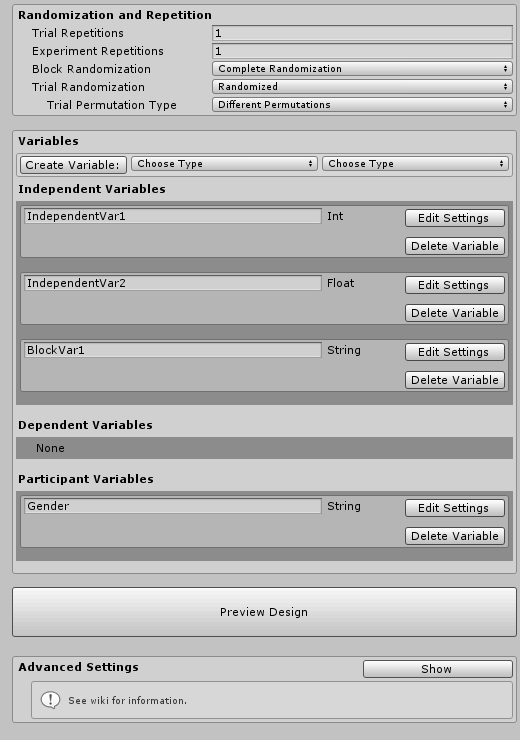
Variables
- Notice that there are sections for different types of variables. Briefly:
- Independent variables: any manipulated variables that change between trials or blocks in your experiment (e.g. which stimuli, presentation time, distance from participant etc.)
- Dependent variables: outputs or measurements from your experiment (i.e. response time, selection etc.)
- Participant variables: Collected at the start of the session from each participant (e.g. gender, ID, etc.)
Independent Variables
Let’s set up our experiment’s variables.
Color
We want to vary the color of our stimulus in each trial. So let’s define an independent variable named Color.
- In the Design file’s inspector, in the Variable Creation section, under type to create, choose “String” to make a text-based variable.
- Select Independent.
- Click Create Variable.
- You should see a new variable appear in the Independent Variables section.
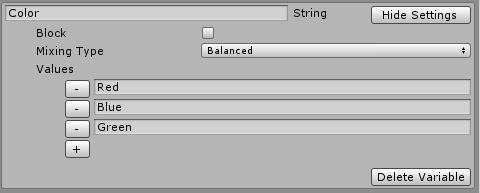
- Name it "Color"
- We want an the trials to be created for every possible color, so choose Balanced for the mixing type.
- Define values for our variable. Click the plus button to add values.
- Add values: Red, Blue, Green.
- You should see something like this:
Size
Next, Let’s create our size variable.
- Create a float independent variable
- Name it "Size".
- Choose "balanced" mixing mode.
- Add values 1, 2, 3.
Participant Variables
We also want to record each participant's gender and age at the start of each experimental session.
Create a string participant variable named Gender
- Check Constrain values. This ensures that the value is restricted to a set of values that we define.
- Type in Male, Female, Other
Create an int Participant variable named Age.
- Keep Constrain values unchecked so we can type in their age.
Dependent Variables
We want to record how closely the participants match the size of the stimulus. We’ll record that in a float dependent variable called MatchedSize. The default value will be assigned to any missing values in case of problems or stopping the experiment early.
Test out our experiment design using basic components
The Script Helper tool defined enough of the experiment to let you get up and started quickly. Lets test out if everything is working as expected before moving forward.
Press play in the editor. You’ll see a window pop up to start an experimental session. This window is called the Runner Interface. It is a helpful tool for configuring an experiment, starting an experiment, and monitoring the progress of a participant through the experiment. Unity may prompt you to install TextMeshPro assets. You should accept this since the Runner Interface depends on them.
Important Notes:
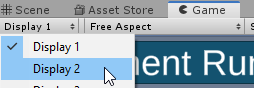
- The Runner Interface blocks the view of everything behind it. For this reason, is meant to be displayed on a secondary display. The idea is that the participant views the virtual world (the experiment) on the primary display, whereas the experimenter can monitor the progress of the experiment on a secondary display.
- To preview this functionality in the editor, make sure you have a second "Game" tab open set to "Display 2". The main experiment will be shown on Display 1, with the interface showing on Display 2.
- You can choose the display on which the UI is rendered in the display settings. See the Settings Page for more info
- Take a look at the previewed trial table and ensure everything is set up properly. Note that the toolkit adds some useful columns to track progress and other metrics.
- Debug mode is useful to check functionality during development without having to type in complicated options. Click Debug.
- Because it’s debug mode it automatically chooses values for our participant variables and other things. A normal run through the program will force you to select a value.
- Once started, the toolkit automatically constructs your blocks and trials based on code that you provide the ExperimentRunner class. At the moment, we haven't provided any, so it reverts to the built-in defaults.
- A new window will appear showing the progress through the experiment.
- In the default scripts, a trial is simply defined as pressing the Space key. Press it a few times to see how the trials advance, and the values of the independent variables change.
Note: Make sure you have one of the "Game" windows focused for the key presses to register
It looks like everything is working properly. Although the auto-generated scripts have enough functionality to allow the experiment to run, but they don't do anything to our Unity scene.
In the next part of the tutorial we'll learn how to extend our auto-generated scripts by defining some custom behaviour in our experiment.